
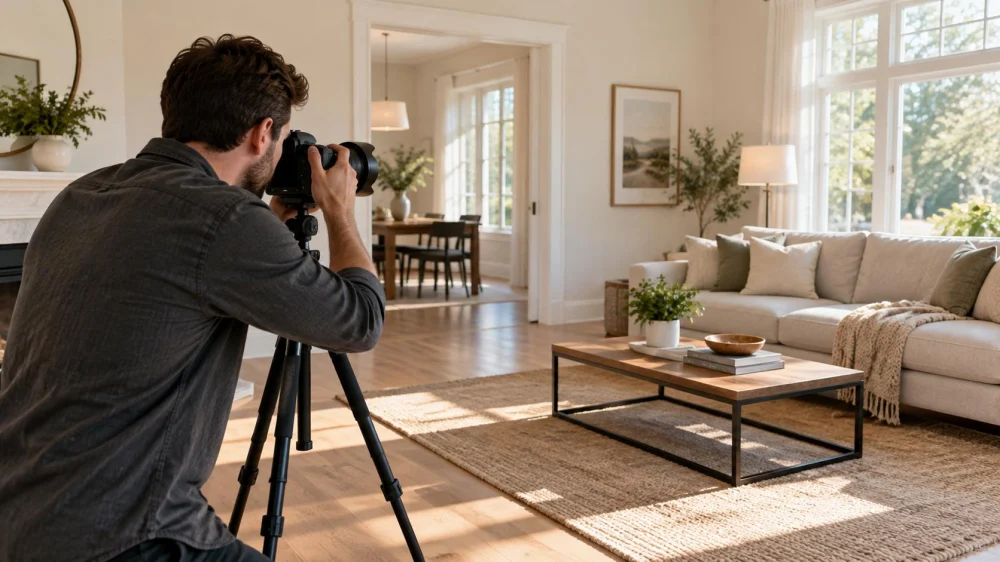
Listing Photo Preparation: A Room-by-Room Seller Plan
On this page
Quick answer
Prepare listing photos by clearing visual distractions, cleaning visible surfaces, arranging rooms to show their actual use, and agreeing on a shot list with your agent and photographer. Complete ordinary preparation before the appointment, then review the images for accuracy before publication. This guide is for US homeowners planning sale marketing; it does not promise a sale price or replace the photographer’s instructions.

West 130 / 130 west hempstead apartments
West HempsteadNassau CountyNew York
130 Hempstead Ave, West Hempstead, NY 11552, USA
Start with a photography brief
A listing photography brief is a short record of the spaces and features that the photo session should document. It helps the seller, agent, and photographer work toward the same presentation rather than making last-minute decisions in every room.
Ask the agent which rooms, exterior views, and functional features buyers need to understand. Tell the photographer about limited access, pets, occupied rooms, or areas still being prepared. Discuss whether furniture should stay in place and whether another appointment is needed after work is complete.
- List key spaces, including any rooms with an unusual layout.
- Identify the preparation task and responsible person for each space.
- Confirm appointment access and the expected room-ready condition.
- Ask how image review and approval will work.
Good preparation is best for presenting an existing home clearly. It is not a reason to undertake expensive renovation without discussing the purpose and budget with your agent.
Prism at Park Avenue South Apartments / prism at park avenue south apartments
New YorkNew York CountyNew York
50 E 28th St, New York, NY 10016, USA
Prepare rooms according to their purpose
Kitchen and dining areas
Clean counters, cabinet fronts, and visible appliances. Move loose packaging, dishes, and cleaning equipment to a storage area outside the shot. Keep surfaces simple so buyers can understand workspaces and circulation. Leave permanent features visible.
Living spaces and bedrooms
Arrange cushions and bedding, clear floor clutter, and keep routes through the room open. Discuss furniture changes with the photographer before moving large pieces. Show a believable room arrangement rather than a configuration that conceals tight access.
Bathrooms and laundry areas
Clean mirrors and surfaces, remove loose toiletries, and put laundry away. Store personal products securely. Do not use cosmetic staging to obscure water staining, damaged fixtures, or other issues that should be addressed with the agent.
Exterior and entrance
Tidy accessible paths, put ordinary yard equipment away, and remove loose debris when safe. Ask the photographer about vehicles or bins that interrupt the planned view. Do not climb onto a roof or perform unsafe work for a photograph.
Use a final pre-session checklist
- Walk the agreed route. Check each room against the brief, including spaces that are easy to overlook.
- Remove personal information. Put paperwork, family-identifying items, and visible credentials away; check reflective surfaces too.
- Check ordinary lighting. Report failed bulbs or fixtures and follow the photographer’s lighting instructions. Do not repair electrical equipment yourself.
- Keep essentials accessible. Store daily-use items where you can retrieve them after the shoot without blocking another planned room.
- Plan for pets and occupants. Agree on a comfortable place away from the working area and follow access arrangements.
A simple room checklist suits an occupied home where people still need everyday supplies. Full staging may be useful for some vacant properties, but confirm its cost, timing, and scope before booking. Avoid assuming that every home needs rented furniture.
Review whether the photos represent the home accurately
Look at the proposed set as a buyer would. Can you understand the room connections, the usable layout, and the features discussed in the listing? Ask about missing spaces or images that create a misleading impression of size or condition.
Discuss edits and any virtual staging with the agent. Ask how alterations will be described and whether the images meet the relevant listing platform’s requirements. A photograph should help a buyer decide whether to visit, not substitute for an inspection or verified property information.
Keep a short correction list: image name, issue, and requested change. For example, flag visible personal documents, an outdated room appearance, or a caption describing an item that is not included. Check final captions alongside the images before publication.
Limits and important notes
Preparation does not determine what must be disclosed, who owns the photographs, or how they may be reused. Confirm those matters with the agent and the relevant agreement or qualified adviser. If the property is tenant-occupied, arrange lawful access and permissions before scheduling.
Leave hazards and technical repairs to qualified professionals. Tell the agent if a room cannot safely be accessed or if the home has changed after photography. Luxen House Realty Hub provides real estate information and agency discovery; the article does not claim that the site supplies photography or staging services.
Frequently asked questions
Should every personal item be removed?
Prioritize private information and distractions within the planned views. Ask the photographer how much preparation is needed; an occupied home does not have to look empty.
Do I need to buy new furniture?
Start with cleaning and simple arrangement. Ask the agent whether additional staging serves a clear purpose and fits the budget before committing to purchases or rentals.
What if repairs finish after the shoot?
Tell the agent what changed and ask whether updated photographs are needed. Do not leave outdated pictures in place if they no longer reflect the marketed condition.
Sources and evidence notes
The NAR consumer guide to selling privacy and safety provides background on protecting personal belongings and information during marketing. The room preparation and review workflow above is general practical guidance, not a quoted industry standard or a guarantee of marketing results. Confirm the specific brief with your agent and photographer.
Next steps
Make a room list, agree on the photography brief, and assign the small preparation tasks. Complete a final walk-through before the appointment and review the finished set for accuracy and private information. Save the agreed changes so everyone knows which images are ready to publish.






 Esa Realty Holdings0.0 (0 reviews)
 Crown Royal Realty, LLC0.0 (0 reviews)
 Emerson Office Suites5.0 (3 reviews)
 The Cardinal Building5.0 (3 reviews)
 The Henry Sales Gallery0.0 (0 reviews)
 Atlantic Real Estate Group0.0 (0 reviews)
 Tips for Selling a Home During Market Fluctuations
 How to Stage a Vacant House on a Low Budget for Faster Sale
 How to Stage Your Home for a Quick Sale
 How to Sell Your Home Quickly During High Inventory Periods
 How to Understand Home Inspection Reports – Complete Guide for Buyers
 How to Evaluate a Property’s Investment Potential: A Complete Guide