

How to Prepare Your Home for Professional Photography
When it comes to selling your home or showcasing a new listing, professional photography is one of the most effective ways to highlight its best features. High-quality photos can make a significant impact on potential buyers, giving them a virtual tour of your property. But to get the best results from a professional photographer, preparation is key. In this article, we’ll guide you through the essential steps to ensure your home looks its best for professional photography.
- 1. Declutter Your Home
- 2. Deep Cleaning Your Home
- 3. Lighting and Natural Light
- 4. Highlighting Key Features of Your Home
- 5. Staging Tips for Your Home
- 6. Final Steps and Considerations
- 7. Find Expert Photography Services at Luxen House Realty Hub
1. Declutter Your Home
The first and most important step in preparing for professional photography is to declutter your home. A clean, organized space allows the photographer to capture the beauty and design of each room without distractions. Remove any unnecessary items from countertops, tables, and floors, such as mail, shoes, or extra furniture.

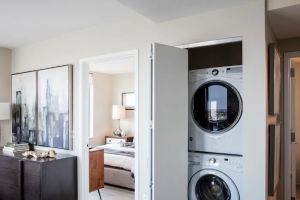
West 130 / 130 west hempstead apartments
West HempsteadNassau CountyNew York
130 Hempstead Ave, West Hempstead, NY 11552, USA
Why Decluttering is Crucial
A clutter-free home helps the photographer capture wide-angle shots that highlight the spaciousness of your rooms. It also draws attention to your home's best features, such as hardwood floors, large windows, or beautiful architectural details, without the distractions of personal items. If necessary, consider renting a storage unit or temporarily storing excess furniture to create a more open and inviting atmosphere.
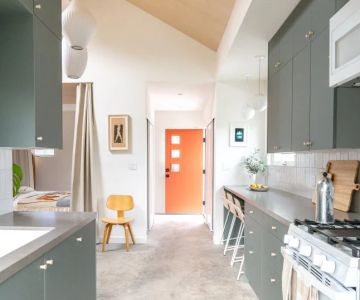
Avalon Brooklyn Bay / avalon brooklyn bay
1501 Voorhies Ave, Brooklyn, NY 11235, USA
2. Deep Cleaning Your Home
A thorough cleaning is essential before the photographer arrives. Dust, smudges, and dirty windows can be noticeable in photos, affecting the overall impression of your home. Clean every room from top to bottom, paying special attention to areas like windows, baseboards, and corners that may be overlooked during routine cleaning.
Key Areas to Focus On
- Windows: Clean windows will allow more natural light to flow into your home, making rooms appear brighter and more inviting.
- Floors: Vacuum or mop floors to remove dirt, dust, and stains. Polished hardwood floors add a beautiful shine to your photos.
- Kitchen and Bathrooms: These areas should be spotless, as they are often focal points in home photography. Clean the counters, sinks, and appliances thoroughly.
3. Lighting and Natural Light
Good lighting is key to professional photography. Natural light, in particular, can make your home appear more inviting and open. Make sure all the curtains or blinds are open to let as much natural light in as possible, especially on bright and sunny days. If your home lacks natural light, ensure that all light fixtures are turned on and that there is no dark or shadowed area in the frame.
Using Lighting to Your Advantage
Consider adding additional lamps or lights in rooms that may appear too dark. Avoid harsh lighting from overhead fixtures, as it can create shadows. Instead, use soft, diffused light that will evenly illuminate your home’s best features. The professional photographer will also help in adjusting lighting, but making sure the space is well-lit beforehand will greatly improve the outcome.
4. Highlighting Key Features of Your Home
Your home likely has certain features that make it unique, whether it's a beautiful fireplace, large kitchen island, or a stunning view. Be sure to highlight these features before the photographer arrives, ensuring that they’re clean, organized, and well-lit. When preparing each room, think about how you want to showcase these special features in the best light.
Rooms to Pay Special Attention To
- Living Room: Ensure the focal point, such as a fireplace or large windows, is visible and inviting. Arrange furniture in a way that creates an open flow.
- Kitchen: Clear counters, clean appliances, and ensure all the lighting is functional to showcase the heart of the home.
- Outdoor Areas: If you have a beautiful garden, patio, or view, make sure those areas are neat and free of clutter for an inviting outdoor space.
5. Staging Tips for Your Home
Staging your home for photography can make a big difference in the final results. Staging doesn't have to involve expensive furniture or drastic changes. Instead, it’s about creating a balanced, attractive environment that enhances the space.
Simple Staging Tips
- Neutralize the Space: Use neutral colors and simple décor to create a timeless look that appeals to a wide range of potential buyers.
- Add Fresh Flowers: A vase of fresh flowers or a bowl of fruit can add a touch of life to the space without overwhelming it.
- Highlight Functionality: In smaller spaces, arrange furniture to show how the room can be effectively used, making the most of the available space.
6. Final Steps and Considerations
Before the photographer arrives, walk through your home one last time to ensure everything is in order. Make sure all lights are turned on, windows are cleaned, and any small touch-ups are done. Be mindful of any clutter that may have returned during the preparation process. The goal is to have your home looking pristine, inviting, and ready to be captured in its best light.
7. Find Expert Photography Services at Luxen House Realty Hub
At Luxen House Realty Hub, we understand the importance of professional photography when it comes to showcasing your home. If you're looking for expert photography services to highlight your property, our network can help connect you with top-tier professionals. Ensure your home makes the best first impression with high-quality, expertly taken photos.
Visit us today to explore how we can assist in getting your home ready for the market and connect you with the best photography services in your area!


 Columbus International0.0 (0 reviews)
 Jay Suites Wall Street - Flexible Office Space New York and Shared Office Space NYC4.0 (34 reviews)
 Oak Tree Brokerage, Inc5.0 (1 reviews)
 The Harkov Lewis Team5.0 (1 reviews)
 Real Broker4.0 (35 reviews)
 Alma Realty Corp.2.0 (188 reviews)
 How to Evaluate Real Estate Market Trends Before Buying | Luxen House Realty Hub
 How to Choose the Right Type of Mortgage for Your Needs – Expert Guide
 How to Stage a Home to Attract Higher Offers
 The Impact of Remote Work on Real Estate Demand in 2025
 Understanding Financing Options for Real Estate Investments | Luxen House Realty Hub
 How to Sell Your Home Without Making Costly Mistakes