
Final Walkthrough Checklist Before Home Closing
On this page
Quick answer
Use the final walkthrough to confirm the home is in the expected condition, negotiated repairs appear complete, included fixtures and personal property remain, the seller has removed agreed items, and no new damage is visible. Bring the contract, inspection and repair documents, photos, and a checklist. Test accessible utilities and appliances with permission, document concerns, and notify your agent or attorney before signing rather than making an informal side agreement.

West 130 / 130 west hempstead apartments
West HempsteadNassau CountyNew York
130 Hempstead Ave, West Hempstead, NY 11552, USA
What a final walkthrough is
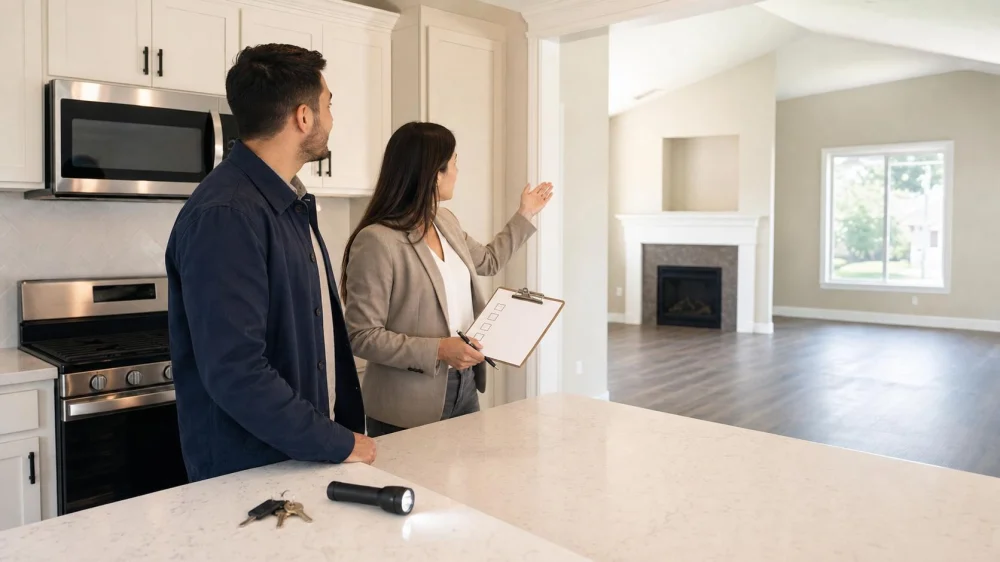
A final walkthrough is the buyer’s last pre-closing visit to compare the property’s current condition with the purchase contract, prior inspection, negotiated repairs, and agreed inclusions. It is usually scheduled shortly before closing, according to the contract and local practice.
It is not a new appraisal, a substitute for a professional inspection, or a chance to reopen every completed negotiation. Its core question is: has the property remained in the condition the parties agreed to transfer?

Prism at Park Avenue South Apartments / prism at park avenue south apartments
New YorkNew York CountyNew York
50 E 28th St, New York, NY 10016, USA
What to bring
- purchase agreement and all amendments or addenda;
- inspection report and relevant photos;
- written repair agreement, receipts, permits, warranties, or contractor documents provided by the seller;
- list of fixtures, appliances, furnishings, remotes, keys, or other items included in the sale;
- phone or camera, charger, flashlight, tape measure, and notes;
- your agent and, when needed, an inspector, contractor, or attorney arranged in advance.
Ask that utilities remain on through the walkthrough and closing when the agreement requires it. Do not turn on disconnected, tagged, leaking, unsafe, winterized, or unfamiliar equipment.
Check the exterior and access
- Compare roof, siding, windows, doors, decks, fences, grading, and landscaping with earlier observations from the ground.
- Look for storm, moving-truck, vandalism, freeze, water, fire, or fallen-tree damage.
- Confirm garages, sheds, gates, parking areas, and agreed storage spaces are accessible and substantially cleared.
- Check that agreed outdoor equipment, mailbox keys, gate controls, and remotes remain.
- Note construction debris, abandoned chemicals, fuel, paint, tires, or bulky items the contract required removed.
Stay off roofs, unsafe decks, loose stairs, and restricted areas. The walkthrough is visual confirmation, not a reason to take physical risk.
Check every interior area
Move room by room in one direction so nothing is skipped:
- Compare walls, ceilings, floors, doors, windows, and trim with earlier condition.
- Look and smell for new moisture, staining, mold-like growth, smoke, gas, sewage, or pest evidence.
- Open accessible closets, cabinets, attic hatches, basement rooms, and crawlspace entries only where safe and permitted.
- Confirm the seller has removed personal belongings and trash as the contract requires.
- Check that included fixtures were not swapped, damaged, or removed.
- Note holes, scratches, broken doors, or floor damage revealed after furniture was moved.
A normal nail hole may differ from major wall damage; contract language and local practice matter. Photograph concerns with a wide context view and a closer detail view.
Test included systems carefully
- Run faucets and showers briefly, observe drainage, and look below accessible sinks for active leaks.
- Flush toilets and check for continuous running or leakage.
- Operate normal lights, fans, garage doors, and included appliances where authorized.
- Check heating or cooling using normal controls only when weather and system instructions permit.
- Confirm refrigerator, range, dishwasher, laundry machines, disposal, or other appliances specifically included remain in place.
- Check visible electrical panel, water heater, HVAC, and plumbing areas for new damage without removing covers or touching wiring.
Do not test emergency valves, force stuck controls, run equipment without water or fuel, or dismantle anything. Stop if you smell gas, see sparks, find active flooding, or encounter another immediate hazard.
Verify repairs and included property
- Read the exact repair language; verify what was promised, not what you assumed.
- Locate the repaired area and compare it with inspection photos.
- Review invoices, paid receipts, permits, approvals, or transferable warranties promised by the agreement.
- Check that the repair appears complete and did not create obvious new damage.
- For technical or concealed work, use the agreed professional reinspection or documentation process rather than guessing.
- Inventory included appliances, fixtures, window treatments, remotes, keys, and personal property listed in writing.
A receipt proves that work was billed, not necessarily that it solved the problem. Where the contract allows, a qualified reinspection can provide better confirmation.
What to do if you find a problem
- Pause and document the condition with dated photos, video, and concise notes.
- Notify your real estate professional and closing attorney or settlement contact immediately.
- Compare the concern with contract language, inspection records, disclosures, and repair agreements.
- Obtain qualified evaluation or cost information when time and the contract permit.
- Put any proposed resolution in a properly drafted written agreement before closing.
- Do not withhold funds, delay closing, accept a credit, create an escrow holdback, or terminate without advice about contractual authority and lender approval.
Possible resolutions vary: repair before closing, documented credit, escrow arrangement, delayed closing, acceptance as-is, or contract remedies. Lenders, insurers, title or settlement professionals, and local law may constrain those options.
Important limitations
Final-walkthrough rights, timing, seller obligations, fixtures, possession, risk of loss, repair standards, escrow holdbacks, and remedies depend on the signed contract and state law. This general US checklist is not legal, lending, inspection, insurance, or tax advice.
A walkthrough cannot expose concealed defects or guarantee future performance. Do not waive a professional inspection because a walkthrough is planned. For structural movement, active leaks, electrical danger, gas odor, fire, sewage, environmental concerns, or major systems failure, seek the appropriate qualified professional and emergency response.
Frequently asked questions
When should the final walkthrough happen?
Follow the contract and local process. It commonly occurs on or shortly before the closing date, ideally after the seller has moved and agreed work is complete.
Can the buyer bring the home inspector?
Sometimes, especially for an agreed repair reinspection, but permission, scheduling, scope, and fees must be arranged. A normal walkthrough is not automatically a full reinspection.
What if utilities are off?
Notify your agent or attorney and review the contract. Without utilities, important checks may be impossible; do not improvise unsafe activation.
Can the buyer cancel because of a walkthrough problem?
Not automatically. Rights depend on the agreement, severity, timing, prior condition, and law. Obtain legal guidance before refusing to close or terminating.
Is the walkthrough the time to verify closing funds?
No. Separately review the Closing Disclosure and verify wiring instructions through trusted known contacts. Do not rely on last-minute emailed payment changes.
Sources and evidence notes
Fannie Mae consumer guidance says buyers should complete a final walkthrough on or near closing to confirm negotiated repairs and ensure the property has not suffered additional damage since the inspection.
Consumer Financial Protection Bureau closing resources emphasize reviewing the Closing Disclosure and other documents, confirming payment logistics, asking questions before signing, and watching for wire-transfer scams. These sources support the workflow; the contract and qualified local professionals govern a specific purchase.
Next steps
Schedule the walkthrough after the seller’s move-out but before signing, within the contract’s timeline. Build your checklist from the actual agreement, inspection, repair addendum, and included-property list rather than using a generic template alone.
Leave enough time to document and escalate a concern. The purpose is not to rush through an empty house; it is to confirm that the property being delivered matches the deal you are about to close.






 Genix Group LLC0.0 (0 reviews)
 Katelyn Holding Ltd0.0 (0 reviews)
 City Homes Realty Group5.0 (284 reviews)
 Post Properties Inc0.0 (0 reviews)
 Elliot Warren Commercial Leasing0.0 (0 reviews)
 William Raveis Real Estate - New York City5.0 (12 reviews)
 Understanding Real Estate Contracts and Legal Terms | Luxen House Realty Hub
 The Future of iBuyers: Are Opendoor and Offerpad Still Buying?
 How to Maximize Profit When Flipping Houses
 How to Maximize Returns When Flipping Homes
 How to Determine the Best Time to List Your Home for Sale
 How to Evaluate a Property’s Investment Potential